User need to change sharepoint site url or site collectiion url that we call as top level site and rename the url of subsite of as well. Rename and change subsite address or url is not much difficult but change site url top level needs special attention. Renaming the site name not change the url, we need powershell to achive this. Run the below powershell command metioned below to change url of site in sharepoint.
maximum upload file size limit need to increase or decrease in sharepoint when we receive request from user. User facing issue like “file size exceeds the limit allowed” when trying to upload file of size large. Then user request to increase sharepoint upload file size limit for site. SharePoint administrator can follow any one of the two methods below.
Advertisements
Increase file size upload in sharepoint using UI method
change upload file size limit using powershell
Increase file size upload limit using UI method
Follow step by step procedure as below to increase sharepoint upload file size limit for a site using UI method.
Open “Application Management’ from central admin in sharepoint 2019.
Default threshold limit for uploading a maximum file size is 10gb. we have to modify and keep the modified value with in this limit of 10 gb. Higher the value of Maximum Upload Size, impact of performance in sharepoint server will be high.
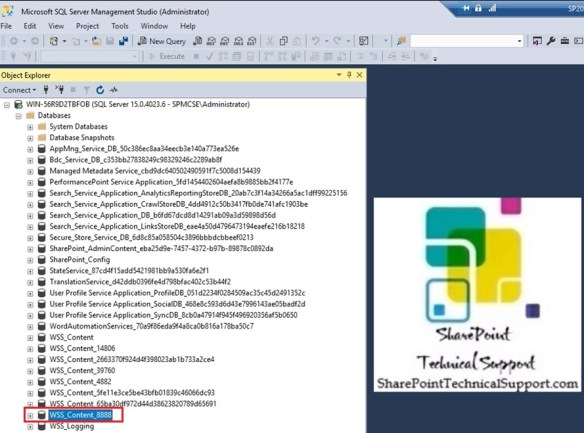
create add a content database is the most common and frequent task in sharepoint 2019 for an administrator. Tasks during sharepoint migration, database upgrade, back up restore of content database, admin follows one of task to add a content database in web application. We can follow manual process of from sharepoint central admin UI method or by using powershell. So in this post will discuss how to create content database.
Advertisements
add a content database in sharepoint using UI method
Follow the step by step procedure to add a content database to web application.
Open sharepoint central admin.
Click on “Application Management” from left navigation.
Click on “Manage content databases” present under “Database”.
Advertisements
Click on “Add a content database”.
Advertisements
Enter “Database Server” name.
Enter “Database Name” present under “Database Name and Authentication”.
Enter “Number of sites before a warning event is generated”. Once number of sites reached to this number, will send warning mail to admin.
create content database in sharepoint using powershell
We can use powershell command to add a content database instead of following multiple options from central admin. Run the powershell cmdletNew-SPContentDatabase as below to add a new content database.